Because the pre-existing kitchen design wasn't thought out very well, there wasn't much room in front of where the refrigerator goes. There is an island that always made it a little difficult to get into and out of the existing fridge. So I measured carefully and checked the stated dimensions of various refrigerators that I found listed online to make sure that they weren't any deeper than the current fridge. Because I try to be thrifty, I also checked prices. That evening, Foxfire and I drove to Fry's, Best Buy and Sears (the three most likely places that I'd found online) and decided to buy a very energy efficient Samsung refrigerator from Best Buy. I hated making such an large purchase in such a short amount of time, but I didn't want all of our food to go bad, and I like having cold juice to drink. So we needed to make a decision that night. Sadly, no one could deliver a fridge the next day, so we had to wait until Thursday, our anniversary, to have the fridge delivered.
Fortunately, the new refrigerator was delivered about 8:30am Thursday morning. Unfortunately, despite the fact that it wasn't any deeper overall than the previous fridge, something in the way that the doors and handles were designed or ?? made it so that it was impossible to open the refrigerator section door enough to be useful. We could open the freezer door all the way, so we could at least put all our frozen food away. And we managed to squeeze most of our other food back into the refrigerated section, but it simply wasn't functional the way it was. However, I really didn't want to have to return that fridge and try and find one that would fit. Simply measuring the depth obviously wasn't enough to make sure it would work. We would have to keep moving fridges in and out until one of them worked. That just really wasn't an option. The other option was to move the island.
We called Home Depot and then our friend DA, who does interior design, and asked about how to move a kitchen island. According to Home Depot, the island was either epoxied to the floor or else it was nailed to 2x4's which were nailed into the concrete. Foxfire made the first of MANY trips to Home Depot to try and get the proper tool to pry the island loose from the floor. Meanwhile, I had to move all my glass, crystal and silver that I had stored in the island out of the island. Fortunately, I had a number of boxes in the garage that I could use to temporarily hold everything. When Foxfire got back, we carefully pulled the wooden trim away from the bottom of the island. Then we looked at, pushed against and lifted the island in various ways to see if we could get it to move. The counter top of the island actually lifted off pretty easily, but that was the only thing we could get to move. We realized that the tool that Foxfire had bought was completely useless. Using a box cutter and screwdriver, we did manage to cut and scrape the two layers of vinyl flooring away from the island on the side that we were going to move the island towards, but we couldn't get the island itself to move.
After a couple of other useless trips to Home Depot, I finally got frustrated enough to attack the island with a screwdriver, hammer and pry-bar. As Foxfire later told a friend of his,"Never underestimate the power of a sufficiently determined ZhiZhu with a hammer, screwdriver and pry-bar." Actually, once I got to the pry-bar stage, Foxfire did have to help me out, but we did finally pop first one side and then the other loose from the floor without seriously damaging the island. The bottom edge was a little ragged, but replacing the trim would cover that up.
We flipped the island onto its back and pried the 2x4's off of it. We cleaned the nails out of both the island and the 2x4's(which we planned to re-use). Then we put the island right side up and moved it to where we wanted it to go, placing the counter top back on it temporarily and checking repeatedly to make sure the refrigerator door could open completely. We actually only needed to move it about three inches, but we went ahead and moved it six inches over so that the side away from the fridge was against the edge of the first un-removed tiles. We were going to end up with bare concrete in the area where the island used to be, but we could line up the side and back so that there was only bare concrete on the side by the fridge and under the toe kick area on the front. And, of course, we made sure that there was still enough walk space on the other side of the island as well.

You can see how little we actually needed to move the island for the fridge door to open fully.
Then Foxfire had to make yet another trip to Home Depot to get a special tool to nail the 2x4's back into the concrete. He ended up renting a tool called the Ramset which was basically a 22 caliber nail gun. Really. It uses a special kind of 22 caliber bullet to fire the nail into the concrete. We removed the counter top again and placed the island where we wanted it. Then Foxfire tilted the island back and I carefully reached under and placed the 2x4's so that they lay against the interior sides of the island. It took us several attempts to get them just right and to lift the island off of them without accidentally moving them as we lifted the island. When we felt sure that the right side 2x4 was in place. Foxfire and I put on our eye and ear protection and Foxfire loaded up the Ramjet and fired nails into each end of the 2x4.
Because I'm paranoid. I made Foxfire help me lift the island back over the nailed in 2x4 to make sure it was in the right place. It was. Then Foxfire again tilted the island back and I carefully placed the left 2x4. We carefully lifted the island straight up so as not to move the left 2x4 and Foxfire fired two nails into either end of that 2x4. Again, we lifted the island back into place to make sure the 2x4's were in the proper place. The left 2x4 was actually about a 1/4 inch too far inside, but we both figured that was close enough. We moved the island again, and Foxfire fired another nail into the middle of each 2x4. Then we lifted the island into place one last time to make sure everything was where it was supposed to be. It was... or close enough. Foxfire nailed through the sides of the island into the 2x4's and the island was secured in its new location. Yay!
Foxfire had had such fun with the Ramjet that I grabbed the camera and took a few shots of him posing with it. My sweetie is such a sexy handyman!

Foxfire made another trip to Home Depot to return the Ramjet and to buy the shims and glue we needed to reattach the counter top. Meanwhile, I used a razor scraper that we already had to scrape off the remains of the glue on the bottom of the counter top. When Foxfire got back from Home Depot, my arm was getting tired of scraping so I switched to nailing the trim back onto the bottom of the island while Foxfire continued to scrape at the old glue. By the time I finished nailing the trim back on, Foxfire had finally gotten most of the old glue off the bottom of the counter top.
We were finally at the last step, attaching the counter top back to the island. Foxfire nailed the shims to the island while I read the instructions on the glue that Foxfire had bought. Unfortunately, according to the instructions, Foxfire had bought the wrong kind of glue. The kind he bought was supposed to be used on rubber and foam, obviously we needed the kind for wood and plastic. Foxfire made yet another trip to HD to get the right kind of glue. When he got back and we prepared to apply the glue, we realized that one of the shims that he had nailed in had split lengthwise. Poor Foxfire had to make yet another trip to HD to get another shim. When he got back, we carefully nailed in the shim, glued the counter top to the island, and we were DONE!!!
Well, almost done. I still need to fill in the holes in the concrete from the where the left 2x4 was originally nailed in. I'll get to that some day soon. And then, of course, we will need to re-tile the kitchen floor, but that will have to wait till our finances are in better shape. I can live with a little bare concrete showing. It's a lot better than having a fridge door that won't open.


Our cat, Intrepid, came to investigate what we had done.
So... Instead of celebrating our anniversary by dining in a fancy restaurant and going to a show, we spent it struggling with an impromptu kitchen remodel brought about by the need to replace our broken refrigerator with a new one. Strangely enough, when Foxfire went online to find out what the suggested gift for the fourth anniversary was, the modern anniversary list stated that the proper gift for the fourth anniversary was appliances. Weird, huh?
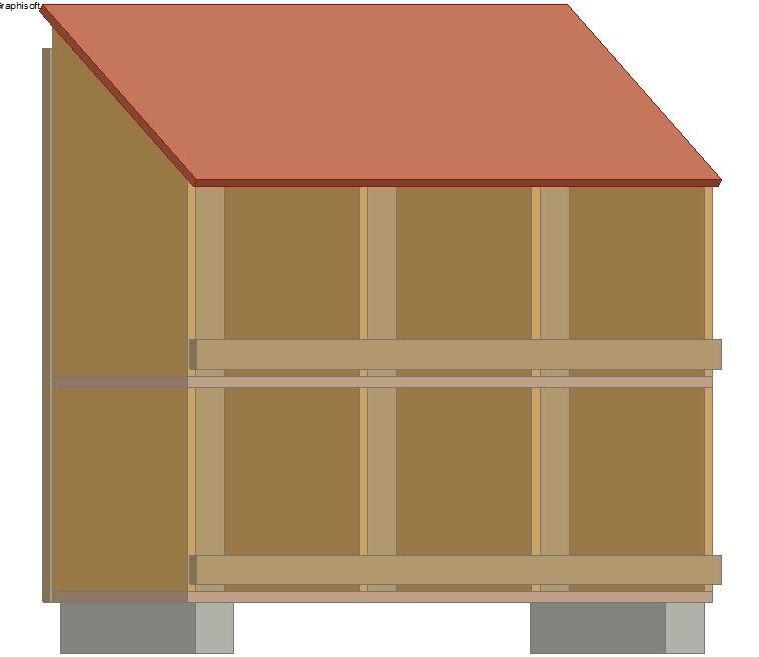
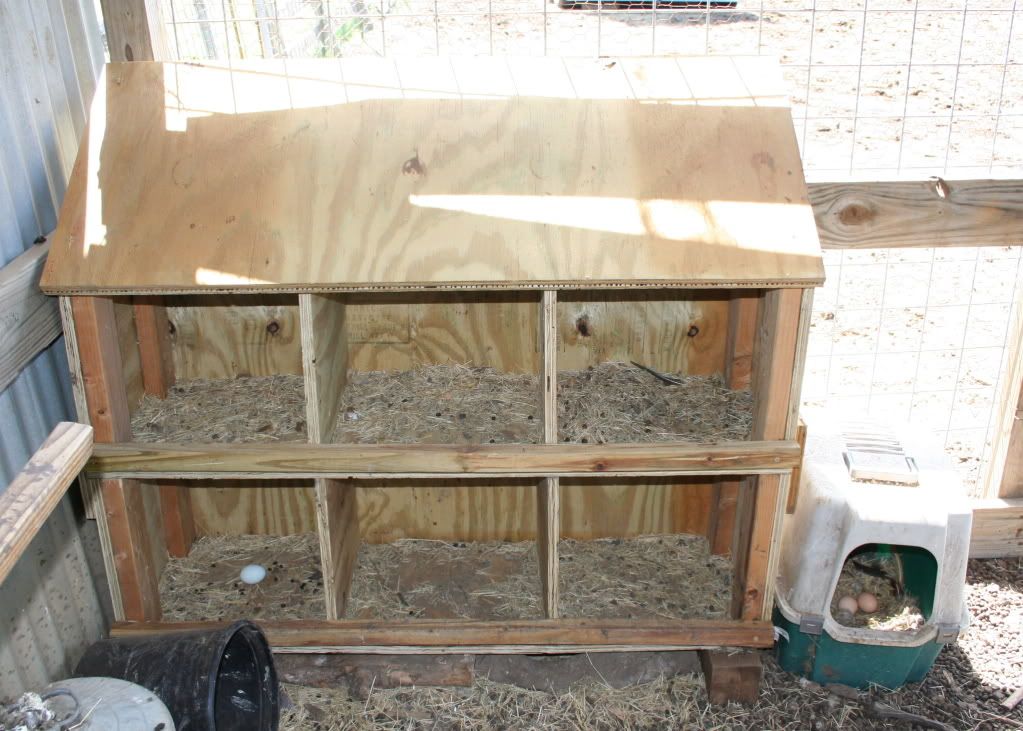
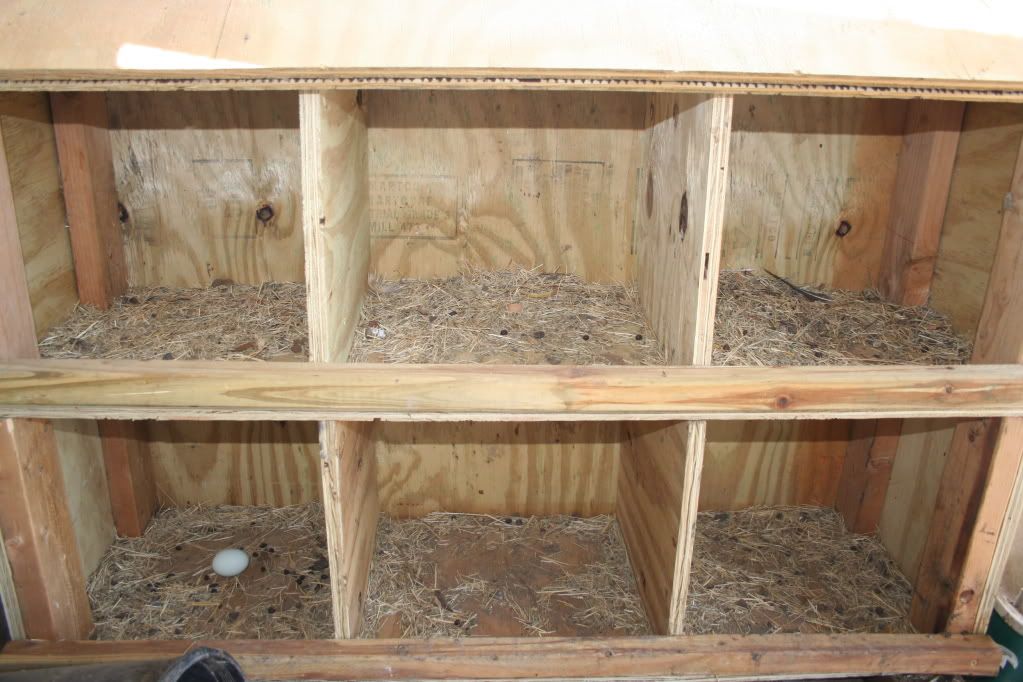
Anyway, I think that if we hadn't had the fairly recent experience of building the nesting boxes that we wouldn't have had the courage to try and move the island ourselves. At least I wouldn't have, maybe Foxfire would have. But anyway, we did have recent experience building things and I'm sure that helped. Between fixing burst pipes, building nesting boxes and moving islands, I'm gradually becoming somewhat of a handywoman. So even though the refrigerator dying when it did was a financial mess(We really didn't need to spend that money right now) and a hassle to deal with; in a way, it was a growth experience. I feel stronger and more capable than I did before.
So... a little impromptu kitchen remodeling can be good for the soul.